Thursday, November 15, 2012

Doughnut Hole Acorns

As the temperature drops and December inches near, I am slowly getting more and more in the Christmas spirit! Though I have vowed to myself I will NEVER start to "deck the halls" before Thanksgiving, I have devised a way to channel all my energy in a different direction:  
fall themed treats!

Everyone loves doughnuts and chocolate, so why not figure out a way out of the ordinary to create something tasty and cute? Throw in some nuts, toffee bits, and pretzels and we're on to something! Not to mention this is quick and easy, everyone will love it - especially the kids!


Doughnut Hole Acorns
A bag of doughnut holes, or homemade doughnut holes
(I'll have a recipe and tutorial on homemade doughnut holes up shortly.)
Pretzel sticks, or small pretzels
Toffee bits, chopped nuts, or sprinkles
nutella


Step One
First pour the nutella and heath bits into separate bowls and break the pretzels into sticks if you need to. I sent my nephew to the store to get me pretzel sticks, I even showed him a picture of the kind of pretzels I wanted. But I still got regular mini pretzels! That's okay though! It is still cute either way, you just have to break the pretzels up to get longer pieces. But pretzel sticks are definitely the easy way to go!


Step Two
In this recipe I used homemade doughnut holes as the base of my acorn, doughnut holes from the store are just as effective! I'm still perfecting my doughnut holes, so once I get those down pat and share worthy, I'll post the recipe on here too! So be looking for it!


To begin the process you'll want to take a doughnut hole and dip it in the nutella. I found that if I warmed it up a little bit in the microwave it adhered to the doughnut holes a lot easier. But CAUTION! If you warm the nutella up too much it'll start to clump, so be sure to warm up just a little at a time.
Step Three
Immediately after dipping the doughnut hole in the chocolate, you'll want to dip it in the toffee bits, or chopped peanuts. My mom loves Heath, toffee - anything with a coffee based flavor! So I decided to pick up Heath Toffee bits at Walmart instead of peanuts, only to have her tell me I should have gotten peanuts! Everyone prefers different things, so it wouldn't hurt to do some of each. Also brown sprinkles look cute as the acorn topper too!

After you have it dipped in both the nutella and the toffee bits poke in the pretzel into the center of the top of the acorn!


Continue to do this over and over until you reach the amount of "acorns" that you are aiming for, or until you run out of doughnut holes! Believe me, you can never make too many of these! Especially if you have kids around, they were gone within an hour after I made mine! But that's what happens when you have 10 nieces and nephews!

Not only is this a bite sized, kid friendly treat, but it's also super fast and easy to make! These will definitely be served for dessert on Thanksgiving! Happy Friday, and enjoy the weekend!


Oh, and GO STATE! I am definitely one proud Wildcat, it's amazing that Kansas State has made it to 10-0, AND to be #1 in the nation!!!

Kara Louise

Sunday, October 28, 2012

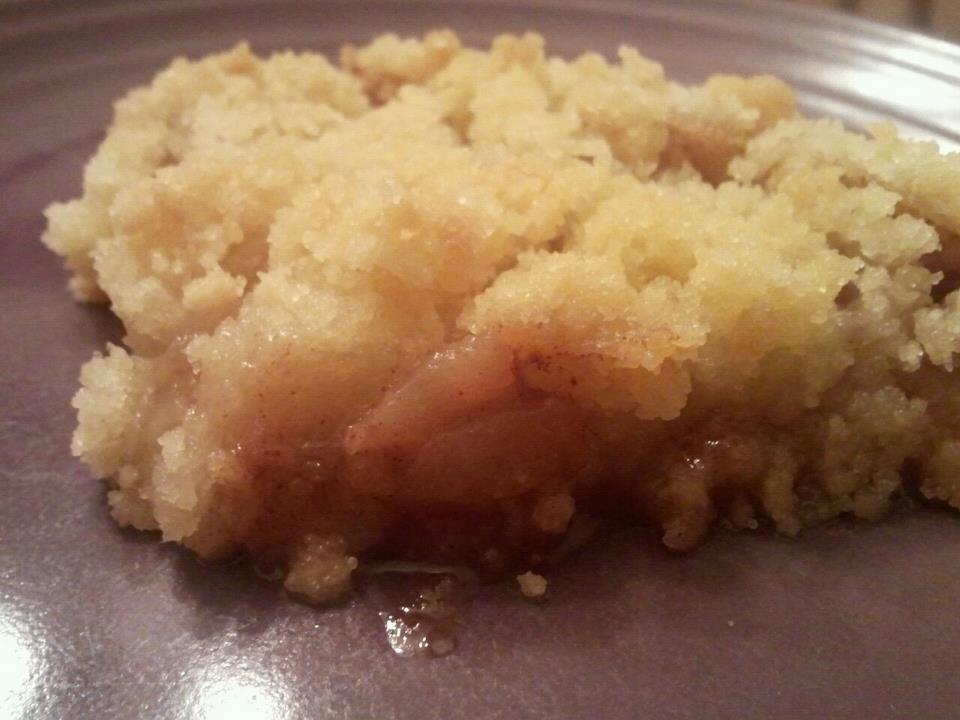
Autumn Apple Crisp

Autumn to me is one of the most comfortable times of the year. During this time of year the temperature is just right - not too cold and not too hot, and all of the green luscious leaves begin to transform into beautiful colors of golden browns, yellows, oranges and reds. Wardrobes begin to change from tank tops to sweaters, shorts to jeans, and flip flops to boots. Not to mention the cuisine itself changes during this time of year. From BBQ and fresh fruit salads to pumpkin pies and comfort food that is warm and melts in your mouth. Because of this, I have decided to start off my Kolache Queen blog by introducing myself with a family favorite, Autumn Apple Crisp. Bet you thought I was going to do something with pumpkins, didn't you?!


Autumn Apple Crisp
Preheat oven to 350
  • 8 cups sliced Jonathon apples(about 2 average sized apples per cup)
  • 2 teaspoons of cinnamon
  • 1 teaspoon of salt
  • 1 1/2 cups of flour
  • 2 cups of sugar
  • 3/4 cups of butter or 1 1/2 sticks of butter

Step One  
Slice all apples into thin slices, but you don't want the slices to be too thin, otherwise it all mushes together. So keep them distinct and hearty, yet still thin and dainty. There is a happy medium, I promise! I use a 4 cups measuring cup to measure out the 8 cups of apples with. It's just easier so I don't have to constantly keep track of how many cups I have in the bowl. I am horrible at remembering that and would definitely mess it up!


Step Two
Once all 8 cups are sliced pour them into a bowl, in this bowl add the 2 teaspoons of cinnamon and the 1 teaspoon of salt. Now this is an important step, when you mix it all together you want the apples to be evenly coated in both the salt and the cinnamon.


Step Three
Next in a separate bowl add in the 1 and a half sticks of butter(or 3/4 cups of butter), 2 cups of sugar, and 1 1/2 cups of flour. Then take a pastry cutter and cut the ingredients together. When it is completely mixed together it'll look very crumbly and there should not be any chunks of butter left.


Step Four
In a GLASS 9x13 dish pour the apples into the bottom to create the first layer. Now you're probably wondering why I emphasized that the dish needs to be glass, and I'll tell you why. -  After years of experience, our family has realized that during the cooling process as the apple crisp sits in the aluminum pan, the entire dessert starts to have a kind of tin-can taste to it. Which is NOT appealing, whatsoever! Therefore using a glass dish makes that kind of a rin-tin-tin taste not even an issue!


Step Five
 Last but certainly not least - adding on the crumb topping! Once the apples are spread evenly across the bottom of the bowl, take the crumb topping(butter, sugar, flour mixture) and smother the apples with it! Cover every inch of apples so that they are no longer visible on the top.


Bake in the oven at 350 degrees for 45 minutes. Check periodically, you'll know that it is done and ready to be removed from the oven when the crumb topping is golden brown.


There you have it! The very first Kolache Queen recipe - Autumn Apple Crisp! Definite perks to making this recipe are, very few ingredients, it's extremely simple, and most importantly - it tastes amazing and is a hit with almost every crowd.
Thank you for reading and feel free to ask any questions or give any suggestions!

Kara Louise

Wednesday, October 24, 2012

Get Excited!

Soon to Come!
*Easy Apple Crisp
*Homemade Donut Hole Acorns!

Get excited! I know I am. :)

Kara Louise

Welcome to the Kolache Queen Blog!

Hello Internet World!
   Thank you so much for checking out my new blog. I promise, as soon as I can I will have my first REAL post up! This is just a post so I don't have an empty blog for now. So be looking forward to seeing some very delicious and yummy family recipes! 
   
    The plan for this blog is to post once a week with a different recipe that include tips and pictures. Eventually I want to post every week in each of the different categories that are: Family Sweets, Healthy Treats, Family Eats, and Healthy Eats.

    I am so looking forward to this new and exciting journey!

Kara Louise

P.S. #3 in the NATION!!! Kansas State University Football excites me almost just as much as this new blog! :)
Can't wait for "Gameday" this Saturday, maybe I'll work in some "Gameday" food too!